Thursday, May 18, 2017

Sahay & Mid-18th Century Rules Update

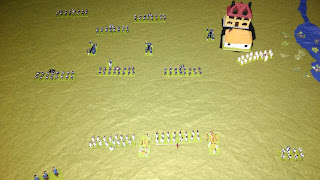
IT will not be possible for us to refight Sahay on the exact 275th anniversary of the battle, which took place in what is now the Czech Republic on May 25 (Wikipedia's May 24 is wrong), 1742.
And the reason has nothing to do with the paucity of English-language material on the encounter, which saw some 10,000 Frenchmen under the command of the future Duke of Broglie - he received his peerage after the battle - defeat a smaller Austrian force just eight days after Frederick the Great beat the Austrians at Chotusitz.
Broglie, in understandable high spirits
As might be expected, French-language sources cover the clash rather more adequately. In particular there is a series of contemporary maps showing how the battle unfolded, and I will be following these for our refight.

Here is the latest summary of my rules, as they will apply at Sahay.

COMMAND & CONTROL
Number of units, divided by 2 (a half is rounded up), gives an army's median card activation value.

MOVEMENT
Foot in firing order and so able to fire volleys: 6cm
Other foot: 8cm
Limbered guns: 6cm
Heavy horse: 10cm
Light horse and generals: 12cm
It takes an activation point to adopt firing order, and the unit may not otherwise move or fire that phase.
Horse take half a phase to mount or dismount.
Guns take an activation point to limber or unlimber, but the gun may be pivoted as part of unlimbering. Guns must be stationary to fire, so may not pivot and fire in the same phase.
One about-face of 180 degrees is free, but a second in the same phase reduces movement by half.
All troops can pass through light infantry without penalty, provided they have enough movement to take them beyond the light infantry. Similarly, light infantry can interpenetrate any friendly troops.
The Variation
Roll a die if a unit is moving three-quarters or more of its maximum move distance. 6, add 25%; 1, subtract 25%.

MUSKETRY
45-degree arc.
Muskets: 8cm. Carbines 6cm.
Roll one die for each 25% of effectiveness remaining and in a single line of bases.
Minimum score for a hit: Regular foot in firing order, 4; Light foot, 5; Dismounted horse and regular foot not in firing order, 6.
-1 if unit moved that phase.

ARTILLERY
45-degree arc.
Canister: 0-6cm. Roll a die and halve the score to get the number of potential hits.
Roundshot: up to 24cm. Roll a die and quarter the score.
Halve the number of potential hits if unit effectiveness 50% or under. Round to nearest fraction, but an exact half has a 50:50 chance of becoming a potential hit.
Dice for each potential hit. 4 or more becomes a hit on infantry and cavalry, but 6 is needed if the target is a gun.

MELEES
A melee happens when the bases of rival units come in contact.
Foot may not initiate contact against horse.
Guns and light foot never initiate contact and never inflict melee casualties (exception: light foot in a wood or built-up area melee as regular foot).
Guns can only be contacted if they have no friendly close-order foot within 4cm. Guns so contacted are automatically eliminated.
Roll the following numbers of dice per 25% of a unit's remaining effectiveness.
Enemy unit...........Hvy Cav...Lance...Lt Cav...Inf fir ord*...Other Inf...Lt Inf
Own unit
Heavy Cavalry.........1................2..........2...............1.................3................2
Lancers.....................1................1..........1...............1.5..............4................4
Light Cavalry...........1................2..........1...............1.................2................3
Inf (not Lt)................1................1.........1................1.................1................1
*Infantry in firing order and attacked frontally
+1 die per 25% when attacking in flank or rear, on higher ground, defending a river bank or defending a built-up area from troops outside the BUA. Bonuses are cumulative. An exact half has a 50:50 chance of becoming a potential hit.
For each die rolled, a 4 or more is a hit.

SAVING THROWS
Behind cover: 4 or more cancels a hit.
Cuirassiers: 6 cancels a hit.

MORALE
Test at the end of any phase in which a unit has lost effectiveness to firing or has lost a melee.
Roll a die, needing the following minimum score not to lose a further 25% effectiveness.
Elite, 3; Regular, 4; Poor, 5.
+1 if a general is attached to the unit. He is eliminated if the unit is eliminated.
+1 if a friendly unit (not light infantry or guns) is to the rear and could reach the unit in two moves.
A unit that fails its morale, and a unit that loses more hits in a melee regardless of whether it fails its morale, retreats one move (with the normal possible variation), ending with its back to the enemy.
A retreating unit is eliminated if the first move of a retreat is obstructed by regular foot (not light infantry) or horse. If the blocking unit is friendly, it must take a morale test unless its horse retreated into by foot.
On subsequent phases in which a retreating unit's army has activation points, it will be rallied for at the start of the phase, requiring a 5 or better to halt and being able to subsequently return to normal action. A general with a unit adds one to the rallying throw.
Note that regular foot lose firing order when retreating and so have an 8cm move.

VICTORY
General, 3pts; Infantry battalion, 2pts, Other unit, 1pt.
Army is defeated when points fall below half the starting total.

Wednesday, May 17, 2017

Battle of Chotusitz - afterthoughts

MY opponent felt his biggest mistake was allowing himself to get bogged down in cavalry melees, in which he was always second-favourite, instead of pressing home his advantage in infantry.
By the time the Prussian foot advanced in numbers, instead of just reacting to the Austrian assault on Chotusitz, the battle was effectively over.
Prince Charles of Lorraine, escorted by the Nagy-Károly Hussars, inspects Chotusitz after the battle
He also felt he was rather unlucky with the card activation system, and a quick calculation shows he was right - I received 109 activation points to Frederick's 78. Nevertheless, we agreed the system worked in that it made the battle much less predictable and so more exciting. We will definitely continue using it.
However, pleased as I was with my victory, it left a rather hollow feeling as it seemed to me that a real-life battle would have continued past the point at which my rules declared it over. After all, the Prussians fought on successfully at Mollwitz after their cavalry were driven from the field. Accordingly, I am adjusting the victory conditions for future battles.

The old rule reads:
An army has lost when its number of units, including the general, falls below half the starting number. Please note that this would not mean half the army had been destroyed - rather that half the units had lost any practical fighting effectiveness.

This is being replaced by:
For the sake of determining victory, count the general as 3pts, each infantry battalion as 2pts and each other unit, including light infantry, as 1pt. An army has lost when its points total falls below half the starting total.

That's for the future. Right now it's time for me to, perhaps immodestly, publish the campaign standings.
War of the Austrian Succession - campaign standings
2pts for a win, plus a bonus point if the win reverses a battle's historical outcome
PLAYERS
.......................Battles....Wins....Losses....Bonus Points....Total Points...Score*
Me......................2.............2...........0...............2.........................6............150%
Opponent............2.............0...........2...............0.........................0................0%
NATIONS
.......................Battles....Wins....Losses....Bonus Points....Total Points...Score*
Austria................2.............2...........0...............2.........................6............150%
Prussia................2.............0...........2...............0.........................0................0%
Britain+..........Yet to fight
France............Yet to fight
*Score is calculated on the basis that two points a battle counts as 100 percent, so it is possible with bonus points to score up to 150 percent.
+This is the Pragmatic Army. It was a thoroughly international affair, but Britain made major contributions in terms of finance and manpower as well as having overall command.

Battle of Chotusitz - the refight (part two)

TURN TWO

The first card turned over from the reshuffled pack is a black queen, meaning 12 activation points for Frederick.
The remaining members of the Brandenburg-Schwedt Cuirassiers fled from the battlefield.
Frederick mostly used his points to advance his front-line infantry and the two limbered guns.
But he had major successes when his Chotusitz gun caused one of my infantry battalions to flee, and his Preussen Cuirassiers followed up their success of the last phase of Turn One by charging my other Modena Cuirassier squadron and eliminating it.
The Prussian bluecoats at last start advancing, along with two of the guns (their limbered status is shown by having been turned around)
The next card is a black jack, giving Frederick 11 activation points.
The Preussen Cuirassiers continued their remarkable run by catching and eliminating the remaining members of the Modena squadron which they had first defeated.
Then Frederick's Garde du Corps Cuirassiers charged and wiped out my Prinz Savoyen Dragoons, although being reduced to half-strength in the process.
The Prussian guns have unlimbered, ready to fire at the first opportunity, while the infantry continue marching forwards
The next card is a red jack, giving me 11 activation points.
My Los Rios Foot rallied just as they were about to exit the table. It will take a further activation point, in a subsequent phase, to put them in firing order.
My gunners' nerve apparently failed them as they failed to score a single hit on the Prussian foot, but my Lothringen battalion rushed into Chotusitz. They fired at the nearby Prussian gun crew but, not being in firing order, failed to hit them.
Chotusitz falls to the Lothringen Foot, who are surely poised to eliminate a Prussian gun
The next card is a red queen, so I get 12 activation points.
On the western wing, my full-strength Batthyányi Dragons charged Frederick's half-strength Buddenbrock Cuirassiers. Both sides inflicted two hits, but that was fine for me as it meant the cuirassiers were eliminated.
On the other wing, the successful run of the Preussen Cuirassiers came to an end when they were caught in the flank and eliminated by my final reserve of cavalry there, the Sachsen-Gotha Dragoons.
My guns had again missed. Even more annoyingly - the dice were definitely not to blame this time - I forgot to leave an activation point for using the Lothringen Foot in Chotusitz.
The Austrian centre awaits the Prussian attack
I have so far lost six units, reducing my strength to 15, but Frederick has lost eight, reducing his strength to 13 - three away from losing the battle.
The next card is a red queen, giving me 12 activation points.
The situation is clearly precarious for Frederick, and there was more bad news when one of my guns at last scored a hit. It was on the Leps-Lehwaldt Grenadiers, who only passed the subsequent morale test thanks to having the King with them and being supported by a battalion in the rear.
This time I did remember my infantry in Chotusitiz, and they duly overran the adjacent Prussian Gun, reducing Frederick to 12 units.
But the Prussians came out on top in a clash of hussars on the western wing - their King's squadron putting my Nádasdy to flight.
View from above the deer park
The next card is a black queen, giving Frederick 12 activation points.
Frederick rallied the final half-battalion of Glasenapp Foot just as it was about to leave the battlefield.
His infantry continued to advance in the centre, with the left-most battalion coming within range of my Deutschmeister-Los Rios Grenadiers. The grenadiers had already taken a hit this move from a Prussian gun, and now took two more from the Lehwaldt Foot. Not surprisingly, they failed their morale test and so broke up completely.
The infantry action in the centre
The next card is a red 10.
The Lehwaldt Foot did not have long to gloat over their success as one of my guns hit them with roundshot. They lost a further 25 percent on failing a morale test, which also caused them to flee.
On the western wing, my Nádasdy Hussars had rallied, but more significantly their colleagues, the Nagy-Károly, charged the Prussian King's Hussars in the flank and destroyed them, although being reduced to half effectiveness in the process.
On the other wing, my Sachsen-Gotha Dragoons used their superior numbers to destroy the remaining Garde du Corps Cuirassiers.
The Prussians were now down to ten units - less than half their starting number - and so had lost the battle.
The scene at the end. The Austrian horse are victorious on both wings, but the infantry battle in the centre looks rather unresolved

To be continued


Battle of Chotusitz - the refight

AS predicted, my opponent chose to be Frederick.
The starting position
Here's my plan.
First, my priority must be to turn my left-wing horse to face the threat from the outflanking Prussians. Command & Control is clearly going to be important from the get-go.
On the other wing, I hope to use my infantry to catch the Prussian cuirassiers before they can free themselves from the Brtlinka morass. That would give my right-wing cavalry a 2:1 advantage in numbers against the Prussian left-wing dragoons.
Generally speaking, cavalry melees should slightly favour me thanks to my advantage in elite units.
Frederick's advantage in guns means I do not want to just stand still with my infantry, even though they are inferior to their Prussian opposite numbers. However, if I can take Chotusitz, perhaps from the flank, my battalions will be at least partly masked from the Prussian guns.

I will be writing up the battle turn-by-turn.

TURN ONE
The first card turned over is a red 10, giving me 10 activation points.
My right-hand gun is just within range of the Prussian gun beside Chotusitz. Counter-battery fire is usually fairly ineffective, but it is my only target, so I take a chance, but with a predictable result.
I use four more points to swing my left-wing heavy horse to face the Prussian cuirassiers, and the remaining points to advance on the right.
The next card is a black 10.
Frederick's Chotusitz gun scores a hit on my advancing Los Rios Foot, but they pass the resulting morale test.
His furthest-right gun hits my Cordova Cuirassiers, who fail the resulting morale test, causing them to flee a move.
He orders his left-wing cuirassiers to leave the Brtlinka morass, but they do not get far in the difficult going, and he sends the left-wing dragoons forward to support them.
His right-wing cuirassiers close on my Hohen-Ems Cuirassiers.
Finally, his infantry in Chotusitz advance to the edge of the village and fire a volley at my Grenzer, reducing them by 25 percent effectiveness. They fail their morale test, losing a further 25 percent and run away.
Next is a red queen, giving me 12 activation points.
My first two points are used in vain attempts to rally the fleeing cuirassiers and light infantry.
My counter-battery fire is again ineffective.
I spent the rest of my points advancing horse on both flanks, and foot in front of Chotusitz.
There was a melee to resolve as my Hohen-Ems Cuirassiers charged Frederick's Buddenbrock Cuirassiers. Both sides scored two hits, but one of the hits on my squadron was negated by a saving throw. His troopers passed their morale test, so not losing a further 25 percent effectiveness, but had to retreat for losing the melee.
Next is a black 10.
Frederick again mostly made cavalry moves, resulting in two melees. The western one saw my Liechtenstein Dragoons defeat his Brandenburg-Schwedt Cuirassiers by two hits to one. The shock of the defeat caused them to lose a further 25 percent effectiveness, and of course they had to retreat.
The eastern melee saw Frederick's Posadowski Dragoons and a squadron of my Modena Cuirassiers inflict one hit on each other, meaning the melee would continue in the next phase.
The alternation continues as the next card is a red 10.
I was unable to rally either of my retreating units.
Both my guns fired at the battalion of Glasenapp Foot, which had begun west of Chotusitz, but last phase started to swing round the front of the village. Both guns missed.
My Lothringen Foot advanced and fired at the other Glasenapp battalion, scoring a hit on the half of the battalion that was not in cover (the village can only hold half a battalion at a time).
The eastern cavalry melee was resolved spectacularly in my favour when the Posadowski Dragoons, already fighting one squadron of my Modena Cuirassiers, was hit in the flank by the other squadron. Not surprisingly, the dragoons were wiped out, but did manage to score a hit on one of my squadrons. The hit was thrown for: 1-4, it would have been on the frontally attacking cuirassiers; 5-6, on the flank attackers. In the event, it was on the flank attackers.
Close-up of the Posadwoski Dragoons being hit in the flank by a second squadron of Modena Cuirassiers
The next card is a black 11.
Frederick began by successfully rallying one of his fleeing cavalry squadrons.
The Chotusitz Glasenapp battalion inflicted a hit on my Lothringen Foot, but the other Glasenapp battalion failed to hit my Los Rios Foot.
The fight for the village of Chotusitz is under way
The alternation sequence at last ended, and with much good fortune for Frederick as a black queen appeared, meaning 12 activation points for the Prussians.
My Los Rios Foot were hit by artillery fire, failed the resulting morale test and fled.
Frederick's moves included limbering his centre and right-wing guns, presumably with the intention of moving them into range of my main body of infantry.
He also ordered his hussars forward from the extreme north-west of the battlefield, and they responded by advancing 15cm - their normal move of 12cm was boosted by the movement-variation rule.
His moves resulted in three melees.
On the western wing, his Bayreuth Dragoons wiped out my Liechtenstein Dragoons while only suffering one hit themselves.
But my Hohen-Ems Cuirassiers edged his Porzellan Dragoons 1-0. The dragoons had to retreat, but did not lose any further effectiveness.
On the eastern wing, his Württemberg Dragoons and a squadron of my Modena Cuirassiers traded one hit each.
Cavalry clash east of Chotusitz and the Brtlinka morass
The next card is a red 10.
I had a stroke of good luck when my fleeing cuirassiers got a move-variation of minus 25 percent, which meant they didn't quite exit the table.
My guns concentrated their fire on a single battalion of Glasenapp Foot, reducing it to 25 percent effectiveness, although it passed its resulting morale test.
Cavalry melees on both wings went in my favour.
On the western wing my Hohen-Ems Cuirassiers catch Frederick's fleeing Porzellan Dragoons from behind and will wipe them out in the subsequent melee, although taking two hits themselves
The massed cavalry melee on the eastern wing
The next card is a red queen - 12 activation points for me.
Significant events this phase: i) the figure of Prince Charles, having caught my fleeing Cordova Cuirassiers last phase, used his +1 modifier to rally them just before they could leave the battlefield; ii) my remaining Grenzer did exit the table, iii) the Württemberg Dragoons on the eastern wing were finally wiped out by my Modena Cuirassiers; iv) sustained musketry from my Lothringen Foot forced the defenders of Chotusitz to flee through the village.
Chotusitz's immediate outskirts are left undefended by fleeing Prussian infantry
The next card is a red 10.
This phase started well for me with the remaining Glasenapp Foot in front of Chotusitz eliminated by artillery fire, and Frederick's Bayreuth Dragoons on the western flank destroyed by my Batthyányi Dragoons.
But I rather overplayed my cavalry hand by sending the Hohen-Ems Cuirassiers to boldly attack a larger force of rallied Buddenbrock Curiassiers. They paid the price by being ridden down.
Worse was to follow when one of my squadrons of Modena Cuirassiers, at 75 percent effectiveness, charged Frederick's full-strength Preussen Cuirassiers. My men failed to inflict a hit, but suffered one themselves and lost a further 25 percent effectiveness through falling morale.
My forward squadron of Modena Cuirassiers has been reduced to 25 percent effectiveness and is about to flee
The next card is a joker, finally ending the turn.
Looking from the west at the end of Turn One
 
Units eliminated at the end of Turn One: five Prussian, three Austrian.

To be continued


Monday, May 15, 2017

Battle of Chotusitz - Final Preparations

AS usual I will allow my opponent to pick which army he wishes to command, although I have little doubt that, as a dyed-in-the-wool lover of all things French, he will choose to oppose France's nemesis for centuries, namely the Hapsburgs.
In any event, here are the full line-ups of the two forces.

AUSTRIA
Prince Charles of Lorraine
Six battalions of regular foot
One battalion of grenadiers (rated elite)
One unit of Grenzer light infantry (stationed opposite Chotusitz)
Four squadrons of cuirassiers (the Hohen-Ems squadron is elite)
Four squadrons of dragoons (the Liechtenstein squadron is elite)
Two squadrons of hussars
Two guns
Total units, including the general, is 21, giving a median Command & Control value of 11 (red cards).

PRUSSIA
King Frederick II (rated superior)
Seven battalions of regular foot
One battalion of grenadiers (rated elite)
Four squadrons of cuirassiers
Four squadrons of dragoons
One squadron of hussars
Three guns
Total units, including the general, is 21, giving a median Command & Control value, after one is added for Frederick's superior ability and one is subtracted for the army being fatigued, of 11 (black cards).

I normally allow both players, after the initial deployment, to alter the position of up to three units, but I am scrapping this rule for Chotusitz as I think it would be unfair to let the Austrian commander rectify the faulty positioning of his left wing.


The view from Schuschitz deer park. I doubt the park will come into play, but I built it, so I want to show it!
Anyway, everything is set up and it seems we will be able to stage our refight on the battle's exact 275th anniversary.

To be continued

The Battle of Chotusitz

THIS engagement is notable in being sometimes described, for example in Wikipedia, as the war's "only major battle started by the Austrians."
Such a description is far from accurate, as a quick perusal of battles in Italy would show, but has much more truth to it if qualified by adding "...against the Prussians."
Indeed, the Austrian commander, Prince Charles of Lorraine, almost caught Frederick napping. It was only by force-marching his men that the Prussian king was able to get into battle array on the morning of May 17, 1742.
The two armies were of roughly equal strength, at about 28,000-strong. I write "roughly equal" because, as usual for this period, sources vary. The Austrians had a small edge in numbers of cavalry; the Prussians enjoyed slightly more infantry.
Frederick also had an advantage in field artillery, although, as at Mollwitz, this is much exaggerated in some accounts by including infantry battalion-guns.
I explained in my rules update earlier this month that the two armies had become closer in quality since Mollwitz, which had been fought more than a year previously.
Early on the morning of May 17, 1742, the Austrians advanced from the south in a slight crescent formation, which had the unintended consequence of leaving their left wing dangerously outflanked by the Prussian right-wing horse.
Overview of the battlefield, looking from the south-west
Thomas Carlyle, who walked and sketched the battlefield in the 1850s while preparing his biography of Frederick, described the ground as a flat plain, despite it being in the Elbe Valley.
To the west is a series of "lakelets, ponds and quagmires," which are impassable to all troops but are connected by a stream that can be crossed by horse and foot - but not guns - in half a move.
The other streams are much less of an obstacle and can be crossed without penalty, except to the east of the village of Chotusitz where the Brtlinka brook spreads out to create an area of "bogholes, islands (and) gullies." This is impassable to guns but can be crossed by horse, with great difficulty, at quarter speed, and regular infantry at half speed - light infantry are unaffected.
To the extreme east are the walls of Schuschitz deer park - unlikely to come into play, but crossable by infantry, taking a complete move to do so.
Unwisely, at least in Carlyle's view, Frederick's deputy, Leopold of Anhalt, chose to occupy the Brtlinka rough ground with cavalry.
The position east of Chotusitz. In the foreground, two squadrons of Modena Cuirassiers are supported by the Prinz von Savoyen and Sachsen-Gotha (left) Dragoons. In the distance, in the Brtlinka rough ground. are the Garde du Corps and the Prinz von Preussen (left) Cuirassiers, supported by the von Posadowski and Württemberg (left) Dragoons
The Austrian commander, Charles of Lorraine, entered Hapsburg service after his older brother, a future Holy Roman Emperor, wed the then-Emperor's daughter, Maria Theresa.
Charles can be seen with the Prié-Turinetti Foot in the centre of the second line of Austrian infantry. To their right are the Deutschmesiter Foot, and to their left the Baden-Baden Foot. The front line of Austrian infantry consists of  (left to right) the Hildburghausen Foot, the Deutschmeister-Los Rios Grenadiers, the Los Rios Foot and the Lothringen Foot.
The battle began with the Austrian left-wing horse attacked in flank by the Prussian right-wing horse, led by 70-year-old General Wilhelm von Buddenbrock. The Prussians were initially successful, until counter-attacked by Austrian reserves, whereupon a series of melees continued, without either side affecting the rest of the battle.
This side of the stream are Austria's Nagy-Károly and Nádasdy (left) Hussars. Beyond them are the blue-coated Batthyányi and Liechtenstein (left) Dragoons, and beyond them are the white-coated Cordova and Hohen-Ems (left) Cuirassiers
One reason why the Prussians were unable to exploit their initial success on this wing was the approach from behind of a regiment of hussars. These were newly-raised Prussians but, because of their unfamiliar uniform, prompted cries of: "Enemy to the rear!"
Prussian Buddenbrock Cuirassiers supported by Brandenburg-Schwedt (left) Curiassiers. Behind them are the Porzellan and von Bayreuth (left) Dragoons with, in the far distance, the King's Hussars
The rest of the battle, briefly summarised, saw the Austrian foot storm and set fire to Chotusitz, but a well-timed counterattack by Frederick obliged Charles to withdraw.
The Prussian infantry centre,  front line (left to right): Röder Foot, Leps-Lehwaldt Grenadiers (Frederick is with them) and two battalions of Glasenapp Foot. The second line consists of the Brandenburg-Schwedt, Grevenitz, Leps and Lehwaldt Foot
The Prussians suffered more fatalities, but the Austrians lost more men missing or deserted, and it was the Prussians who held the field of battle.

To be continued

Friday, May 05, 2017

Wargames Rules For Mid-18th Century Battles In Central Europe (Abbreviated & Updated)

I AM updating the rules ahead of our refight this month of the Battle of Chotusitz. Alterations have been made to Movement, Characteristics and Command & Control (which is being used instead of the normal Turn Sequence). Below is an abbreviated summary of the rules with the updated bits italicised.

COMMAND & CONTROL
Bob Cordery, in his recently published The Portable Wargame, has devised a system baring similarities to Bob Jones' Piquet rules but using ordinary playing cards.
Bob Cordery's The Portable Wargame is the latest addition to my wargaming library
He uses it for solo battles but I think it could work just as well for normal games, and I intend to try it with the help of my regular wargaming opponent.
Here is the system, which I have slightly adapted to suit my circumstances.
Begin by allocating one player's army the red cards and the other the black ones.
1. Take the number of units, including the general, that the red army has, and divide by two, rounding up if not a whole number. The result is the army's median playing-card value.
2. Remove from two packs of ordinary playing cards the red median cards and the ones immediately higher and lower (you could also use one pack but designating, say, the aces, 2s and 3s as wild cards).
For example, if the red army has eight battalions of regular foot, six squadrons of horse, three guns, a light infantry unit and a general, it has 19 units, giving a median value of 10 (9.5 rounded up). Accordingly, remove the red 10s, 9s and jacks, giving 12 cards in all (remember, we are using two packs).
3. Repeat the process for the black army, giving a further 12 cards. Add two jokers, and shuffle well.
4. At the start of each turn, reveal the top card. The colour and number indicate who gets to activate how many units in that phase of the turn. For example, a red jack would mean the red player could activate 11 units.
The player must spend activation points in the following order: 1) units retreating, 2) guns firing, 3) other movement, 4) musketry. Once he has used his activation points, or runs out of useful moves, any melees are resolved.
5. Turn over the next card for the next phase, repeating until a joker is revealed. A joker ends the turn, after which all the cards are shuffled and the next turn starts.

MOVEMENT
Regular foot in firing order, ie in line in good order and so able to fire volleys: 6cm
All other foot: 8cm
Limbered guns: 6cm
Heavy horse: 10cm
Light horse and generals: 12cm
It takes a complete phase for foot to adopt firing order, and they may not fire that phase. Cavalry require half a phase to mount or dismount.
Guns take a phase to limber or unlimber. Pivoting a gun counts as movement (artillery may not move and fire in the same phase), but can be done as part of unlimbering.
Infantry can shuffle sideways at half-speed.
There is no penalty for wheeling or for an about-face of 180 degrees, but a second about-face costs half a phase (I previously penalised wheeling of more than 45 degrees but have decided this is a case of double-jeopardy as wheeling is slow enough anyway thanks to the ground that has to be covered by troops on the outside of a pivot. I have also removed the ban on wheeling during the second half a move aimed at making melee contact.),
All troops can pass through friendly light infantry without penalty providing they have enough movement to take them beyond the light infantry. Similarly, light infantry can interpenetrate any friendly troops.
Only one unit can contact each face of an enemy unit.
The Variation
Roll a die every time a unit is moving 75 percent or more of its movement distance for that phase.
6: add 25% to the distance covered
2-5: no change
1: subtract 25% from the distance covered
Terrain
Players should decide before a game how hills, woods, rivers, etc affect movement. Alternatively, the effect of, say, a river can be determined by dicing when a unit reaches the river's banks.

MUSKETRY
Troops can fire within a 45-degree arc of the front of their base.
Musket range: 8cm
Carbine range: 6cm
Roll one die for each 25 percent of a unit's effectiveness remaining and in a single line of bases,.
Minimum score needed for a hit:
Regular foot in firing order: 4
Light foot: 5
Dismounted light horse (except for lancers), and regular foot not in firing order: 6
Subtract 1 from the score if the unit moved during that phase.
I have removed the ability of horse to fire while mounted. Such an action would be fine in a skirmish game but is not appropriate for a squadron en masse in a large mid-18th century battle.

ARTILLERY
Canister range: 0-6cm. Roll one die (halve the score if the unit's effectiveness has been reduced to 50% or  lower).
Roundshot range: up to 24cm. Roll one die and halve the score (halve again if unit effectiveness is 50% or lower).
Halve the final score to get the potential number of hits. Fractions are rounded to the nearest whole number, but an exact half is diced for with a 50-50 chance of being a hit.
Dice for each potential hit, needing a 4 or more to score a hit on foot or horse, a 6 if the target is a gun.
A gun on a hill can fire roundshot over the heads of friendly troops who are at least two contours lower and are nearer the gun than the gun's target.

MELEES
A melee happens when the bases of enemy units come in contact.
There is no bonus for charging (the precise details of how units came to clash is considered a tactical detail below the control of an army's commanding general) but there are restrictions on who can charge whom.
Foot may not charge horse.
Artillery and light infantry never charge and never inflict casualties in a melee. The one exception to this rule is that light infantry in a wood or built-up area melee as regular foot.
Artillery may only be charged if it has no friendly close-order foot within 4cm. Artillery is automatically eliminated in a melee.
To resolve a melee, roll the following number of dice per 25 percent of a unit's effectiveness remaining.
                            Enemy unit
                            Hvy Cav...Lance...Other Lt Cav...Cl Ord Inf*...Cl Ord Inf#...Lt Inf
Own unit
Heavy Cav                1              2                 2                     1                    3             2
Lancers                      1              1                 1                     1.5                 4             4
Other Lt Cav             1              2                 1                     1                    2             3
Close Order Inf          1              1                 1                     1                    1             1
*in firing order and attacked frontally.
#all other close-order infantry.
Throw an extra die per 25 percent effectiveness when attacking in flank or rear (for first round of meleeing only), on higher ground, defending a river bank or defending a built-up area from troops outside the built-up area. These bonuses are cumulative. Round up or down as for artillery fire.
Each potential hit becomes an actual hit on a throw of 4 or more.
After a round of meleeing, the side suffering more hits that phase, including any inflicted by firing, retreats a full move, with the usual possible distance-variation adjustment, and ends with its back to the enemy.
If the number of hits is equal, there will be another round of meleeing at the end of the next phase.
A retreating unit is eliminated if its retreat is obstructed by another unit that is not light infantry or artillery. If the obstructing unit is of the same side, it must take a morale test unless it is a mounted unit retreated into a by a foot unit.

SAVING THROWS
A hit suffered from firing or meleeing usually reduces a unit's effectiveness by 25 percent, but some troops get a saving throw.
Roll a die for troops behind cover, cancelling a hit on 4 or more.
Cuirassiers get an extra saving throw thanks to their armour, cancelling a hit on a 6.

MORALE
Test when a unit loses 25 percent effectiveness or more from firing, or loses a melee.
Roll a die. If the following score is not made, remove a further 25 per cent effectiveness.
Elite: 3.
Regular: 4.
Poor, militia: 5.
A general may be attached to any unit. Such a unit adds 1 to a morale throw. The general may switch units but is eliminated if the unit he is with is eliminated.
A unit adds 1 to its morale throw if it has a friendly unit directly behind and able to reach it in two phases by normal movement (such a friendly unit can only give support to one unit). Exception: light infantry and artillery units cannot give support in this way.
A unit that loses 25 percent or more effectiveness from firing, and fails the resulting morale test, retreats a full move - with the usual possible distance-variation adjustment - and ends with its back to the enemy.
A retreating unit is eliminated if the first move of its retreat is obstructed by another unit that is not light infantry or artillery.
If the blocking unit is friendly, it must take a morale test, unless it is cavalry retreated into by infantry.


RETREATING UNITS
A retreating unit will be diced for at the start of that player's each subsequent phase, needing a 5 or better to return to normal action. A general present with the unit adds 1 to the die throw.
Note that elite units are treated the same as other units - if they broke in the first place, something very serious must have happened to them.


ARMY CHARACTERISTICS
For Chotusitz:
Austrian foot and Prussian horse had improved since Mollwitz.
Accordingly, Prussian foot have only a 50:50 chance of adding 1 to each musketry throw.
Prussian horse, although now much more of a match for their Austrian counterparts, are not allowed any elite units.
Frederick the Great adds 1 to Prussia's median card value (see Command & Control). But this is cancelled because many of the Prussian troops had to be force-marched to get into position and so were fatigued.