Showing posts with label Franco-Bavarians. Show all posts

Thursday, March 30, 2017

French Fini

TODAY I completed a battalion of Poitou infantry, which more-or-less finishes my French forces (especially when their Bavarian allies are taken into account).
Poitou Infanterie
Here is my full French army, with its Bavarian allies in support (the Bavarian units in the photo below are marked with a *).
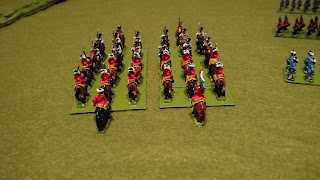
Three 8pdr guns are at the front while lurking in the wood of fir trees are the Chasseurs de Fischer. In the main first line, from left to right, are Von Gschray Hussars (*), Royal-Cravate Cavalerie, Cuirassiers du Roi, four infantry battalions (Poitou, Wittmer, Touraine and Grenadiers de France), Gendarmes de la Garde, Colonel General Cavalerie and Bercheny Hussars. Between the two main lines is Maurice de Saxe, and behind him from left to right are Languedoc Dragoons, four infantry battalions (Alsace, Champagne, Navarre and Picardie) and Dragoons du Roi. To the rear are two squadrons of Hohenzollern Dragoons (*), two battalions of Kurprinz Foot (*) with a further half-battalion of Kurprinz Grenadiers (*) and the Prince de Soubise, and 9pdr and 6pdr guns(*).

Close-up of the centre of the Franco-Bavarian forces

Thursday, March 24, 2016

The Battle of Einsamenhügel - Part Two

TURN FOUR (continued)
This proved a particularly bloodthirsty turn with the musketry duels resulting in the Pragmatic Army losing the Buffs and Royal Foot.
But it was even worse for the Franco-Bavarians, who lost the Champagne Foot, the Grenadiers de France and one battalion of Kurprinz Foot.

Overview of the battlefield from behind the Franco-Bavarian lines at the end of the fourth turn
Close-up of the cavalry duel between the Modena Cuirassiers and Hohenzollern Dragoons, with the former getting much the better of it and the latter about to flee. In the centre background can be seen the Royal-Buff Grenadiers with the blue coats of the Dutch foot beyond them
Units eliminated after four turns.Pragmatic Army: four (hussars, King's Own Horse and two battalions of foot)
Franco-Bavarians: six (hussars, one squadron of Hohenzollern Dragoons and four battalions of foot)

TURN FIVE
A relatively uneventful turn, except for the Kurprinz whose last remaining soldiers were eliminated by some well-directed artillery fire.
Units eliminated after five turns.Pragmatic Army: four (hussars, King's Own Horse and two foot battalions)
Franco-Bavarians: seven (hussars, one squadron of Hohenzollern Dragoons and five battalions of foot)
And at this point the turn became rather more eventful as, with the outcome of the battle no longer in doubt, Maurice conceded.

Final view of the battlefield
The victorious King George II with grenadiers from the Royal Foot

Wednesday, March 23, 2016

The Battle of Einsamenhügel

BEFORE battle commenced, we agreed that an army would lose once it was reduced to less than half its starting number of units (rather than less than a third).

TURN ONE
I sent my forces in a general advance all along the front while Maurice sent forward his right flank but held back the Bavarians on his left.


Looking from behind the Bavarian Kurprinz Foot. Close together in the middle distance are the British grenadiers and the Royal Foot, who have King George with them
Both sides' artillery had immediate success, with my Buffs and one of Maurice's Kurprinz battalions losing 50 percent effectiveness.
On the extreme right, from the Franco-Bavarian perspective, the first melee was fought when the two hussar squadrons clashed, each reducing the other by 50 percent.

The first melee involves the Austrian Csáky de Keresztszegh and French Bercheny Hussars. The figure of Maurice can be made out near the centre of the photo with the blue-uniformed Cuirassiers du Roy
TURN TWO
Easily the most significant event of this turn was the big cavalry melee on the French right flank.


The cavalry clash, and the infantry prepare to exchange volleys
The hussars again fought to a draw, each squadron reduced to just 25 percent effectiveness.
But the clash of heavy cavalry was disastrous to the Pragmatic cause - the Hanoverian Von Aldeleben Dragoons were cut down and sent packing by the Cuirassiers du Roy while the King's Own Horse were completely wiped out by the Colonel General Cavalerie, who suffered no loss of their own.

My left-wing horse have all but disappeared, leaving the foot looking very vulnerable
TURN THREE
The bloody hussar melee finally resolved itself...with both squadrons eliminated.
Meanwhile the superiority of British musketry asserted itself on my left flank, while Maurice on his left prudently chose not to order his Bavarian foot to open fire on my advancing infantry as my battalions would have been entitled to fire back despite having moved.
Finally, on my extreme right, the Modena Cuirassiers and Bavaria's Hohenzollern Dragoons - old enemies from our version of the Battle of Blasthof Bridge - came to blows, with the Austrians getting much the better of the first round of meleeing, eliminating one enemy squadron.

Close-up of the red-coated Hohenzollern Dragoons taking on the Modena Cuirassiers
Units eliminated after three turns.
Pragmatic Army: two (hussars and King's Own Horse)
Franco-Bavarians: three (hussars, Picardie Foot and one squadron of Hohenzollern Dragoons)

TURN FOUR

A bird's eye view from behind the Pragmatic lines at the start of the fourth turn
Again at the start of turn four, this time from behind the Kurprinz Foot. Note that I have moved King George from the Royal Foot, where he was in mortal danger of going down with the battalion, to the safer station - I hope! - of being with the Royal-Buff Grenadiers
(to be continued)

Tuesday, March 22, 2016

Final Adjustments

ONCE both sides have deployed their forces, I allow each player to move up to three units. Again, the player uses a sketch map to mark the moves.
I responded to Maurice's set-up by ordering the Hanoverian horse into the front line on my left and switching my hussars from the right flank to the left. I also ordered the second squadron of Modena Cuirassiers into the front line on the right.
Maurice stood pat.

The amended view from behind the Pragmatic right flank, looking towards the Bavarians

A close-up from behind the French foot
Finally we were ready for battle.

But first ... the view the villagers of Bad Wörishofen had of the two armies stretching into the distance

Adding The Armies

AS very much expected, my opponent, a dyed-in-the-wool Francophile, chose to take the Franco-Bavarians, and to sink his identity in that of his hero, Maurice de Saxe.
I was tempted to put the famous von Kornberg is charge of the Pragmatic Army as he served me so well in winning our refight of Blasthof Bridge from Charge!, and in leading the Austrians to victory over Frederick's Prussians at the Battle of Christmas Eve (both engagements were covered extensively in my previous blog).
But the Pragmatic Army was really a mostly British-run affair, so I plumped for being represented on the table by the illustrious figure of King George II.
We diced for choice of long side, and I won 6-5 after the first roll resulted in a 6-6 tie (perhaps the dice should have been checked at this point for loading).
I chose the side with the Einsamenhügel, and we proceeded to make sketches of our intended deployments before enacting them on the table.

The Pragmatic Army
Because I had the Einsamenhügel in my deployment area, I went for an aggressive formation as I was able to site my two batteries of Royal Artillery on the crest. From there they could survey the whole battlefield and be high enough to fire over friendly troops in front of them, at least until the armies came too close together.
In the front line, left to right in the photo, are Austrian Csáky de Keresztszegh Hussars and Modena Cuirassiers. Then come four battalions of British foot: Royal-Buff Grenadiers, Royal Foot, The Buffs and the 5th Marines, and on the extreme right is a squadron of the King's Own Horse.
Both the Modena and King's Own squadrons have cuirasses, and the combined grenadier battalion counts as elite for morale purposes.
The 5th Marines are a tribute to my paternal grandfather's regiment (he was a sergeant in the Royal Marines and won numerous fencing trophies at The Royal Tournament). They count as regular line infantry but can also fight as light infantry if needed.
In the second line, again left to right, is a second squadron of Modena Cuirassiers, a battalion of Dutch Buddenbrock Foot and, after the guns, two Hanoverian units: a battalion of Friedrich Wilhelm von Klinkowström Foot and a squadron of Von Aldeleben Dragoons.
My opponent, whom I shall refer to as his chosen alter ego Maurice for the rest of this battle report, selected an even more aggressive line-up, no doubt worried about my terrain advantage.

Looking from behind the Pragmatic lines to Maurice's Franco-Bavarians
In the front line on the far left are three squadrons of horse:  Bercheny Hussars, Cuirassiers du Roy and Colonel General Cavalerie. Both the squadrons of heavy horse have cuirasses, and the du Roy are elite. Maurice has positioned himself with them.
Between these cavalry and the two batteries of French 8pdrs are two battalions of foot: Grenadiers de France and Picardie. The Grenadiers are elite. Behind these battalions are two more: Navarre and Champagne.
Maurice has tasked the Bavarians with holding his clearly refused left flank. There are two battalions of Kurprinz Foot and two squadrons of Hohenzollern Dragoons.
There is a general view that the firepower of British foot at the time of the War of the Austrian Succession was superior to that of most other nations, but almost certainly not a match for the Prussians.
Accordingly, for this battle at least, the four battalions of British foot will have a 50:50 chance of adding 1 to every musketry throw.

Sunday, March 20, 2016

Christening The Table

I WILL be christening my new wargaming table with a battle, set in the 1740s, against my regular wargames opponent.
As the guest, he will have choice of sides but since he is a huge Francophile I have little doubt which side he will pick as the battle will see the Pragmatic Army taking on a force of Franco-Bavarians.
Each army will consist of a general, five battalions of regular foot, one battalion of grenadiers, four squadrons of heavy cavalry, one squadron of hussars and two guns, but there will be some differences between the troops' capabilities.
I will also be using my random terrain generator, modified to take into account the larger dimensions of my new playing surface when compared to the kitchen table we had been using.
The table is 6ft by 2ft 6in and the battle is being fought in central Europe, somewhere east of the Rhine.
Random Terrain Generator
1. Mentally divide the board into 12 sectors (two rows of six) each 1ft by 1ft 3in.
2. Roll a die for each sector, a 4, 5 or 6 indicating a terrain piece.
3. If a terrain piece is indicated, roll again: 1-hill, 2-water (stream, river, lake or marsh, etc), 3-wood, 4-built-up area (anything from a farmstead to a walled town), 5- Player A's choice, 6-Player B's choice.
If the exact nature and size of the feature cannot be agreed by the players, more dicing will be necessary. This is also a good way to decide the route a river takes across the board.
Note that on average a battlefield generated under this system will have six terrain features but a stream or river might well run through several sectors while still counting as a single feature.