 |
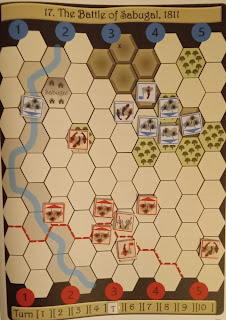
| Situation after turn four |
In area 2 my cavalry enter the trees and charge the French artillery. I roll 5, two 3s and 1, reducing the artillery to one-strength. The infantry advance obliquely left and fire at the same target. Their three dice are decreased for moving, but I roll 5 and 1, eliminating the French artillery.
In area 3 my artillery fire at the enemy infantry to their front. The three dice are increased by two for firing at short range and one more for being next to Sir Arthur Wellesley. I roll 5, three 3s, 2 and 1, reducing the enemy unit to one-strength. The forward infantry fire at the enemy unit directly to their front, rolling two 6s, 5 and 1, eliminating the French unit.
In area 4 the infantry advance and fire at the one-strength French infantry. The four dice are decreased for moving, but I roll 5, 3 and 1, eliminating the French unit.
 |
| It has been a good half-turn for the Allies, but my left-flank cavalry are very vulnerable, despite being in cover |
Only the infantry in area 1 can activate, and they have to form square as there are Allied cavalry within three hexes. They then fire, their four dice being decreased for the cavalry being in cover and for being in square (on reflection I have dropped my amendment to the rules, which gave a minus-two penalty for being in square - I think I overly penalised the infantry, especially as cavalry can be quite effective against squares). The infantry roll 6, reducing my unit to two-strength*.
 |
| The green bead shows the right-flank French infantry have formed square |
No comments:
Post a Comment